SMS Debt Collection with CloudContactAI
This guide will walk you through how to do SMS debt collection with CloudContactAI. Debt collection is typically divided into 4 buckets based upon Days Past Due (DPD): 1-30, 31-60, 61-90, and final. CloudContactAI provides templates and file formats for these buckets.
First, sign up for CloudContactAI by navigating to this link. After you sign up, on the Welcome Dialog, click Add Contacts.
In CloudContactAI, the default CSV template to upload a list of contacts is not for Debt Collection. Please use this template, test_collections_1-30dpd.csv.
In this template file, we’ve specified the following header and data rows:
Name | Value |
|---|---|
firstName | Betty |
lastName | Ruble |
amount | 30.00 |
retailer | Amazon |
orderNo | 123 |
paymentLink | |
phoneNumber | 4158906431 |
dueDate | 12/19/22 |
creditorName | The Collectors |
The field names match up to the messages that are in CCAI for you.
In the Add Contacts view, I’m going to upload the default collection template file. I’m going to entitle the list the name of the file “test_collections_1-30dpd.csv”.
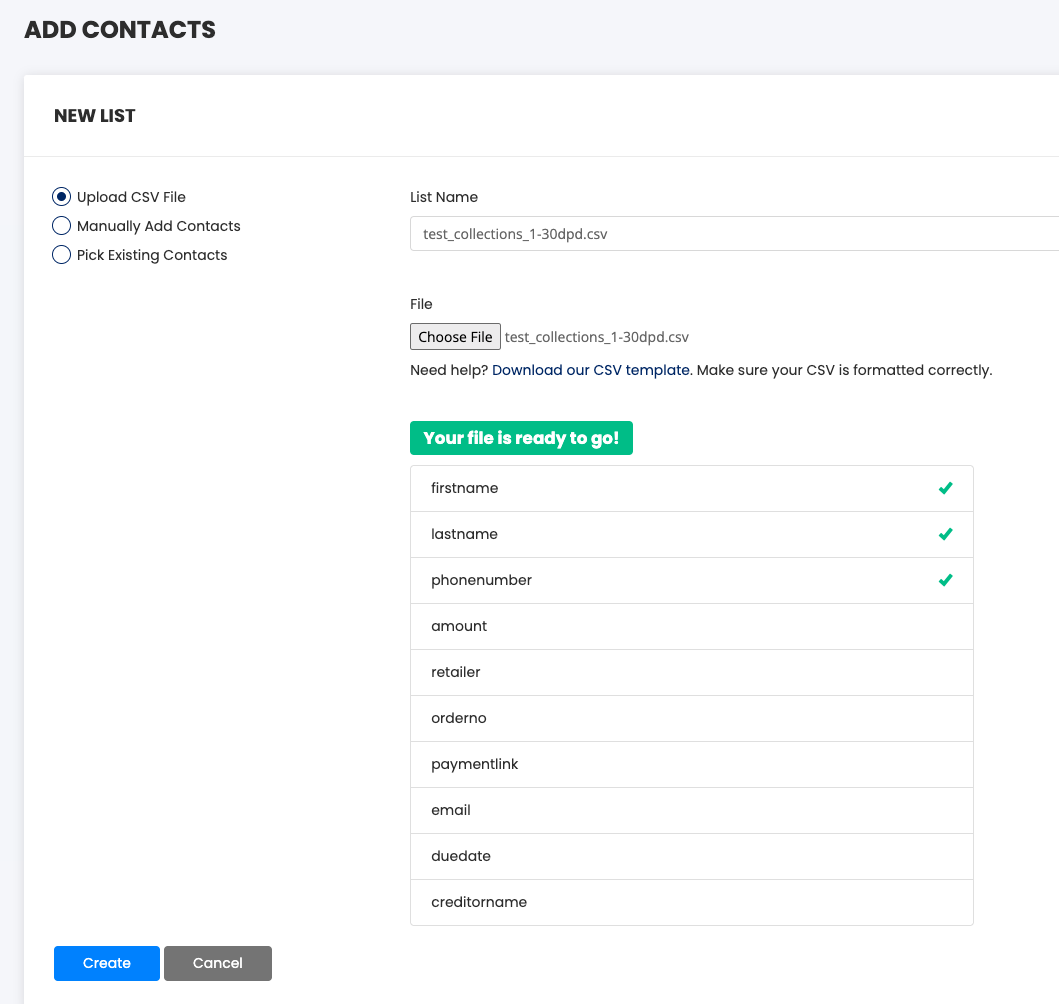
I’ll click the “Create” button, and then my Contact list will be uploaded.
When I navigate to the Contact Lists tab, I’ll see my uploaded list.

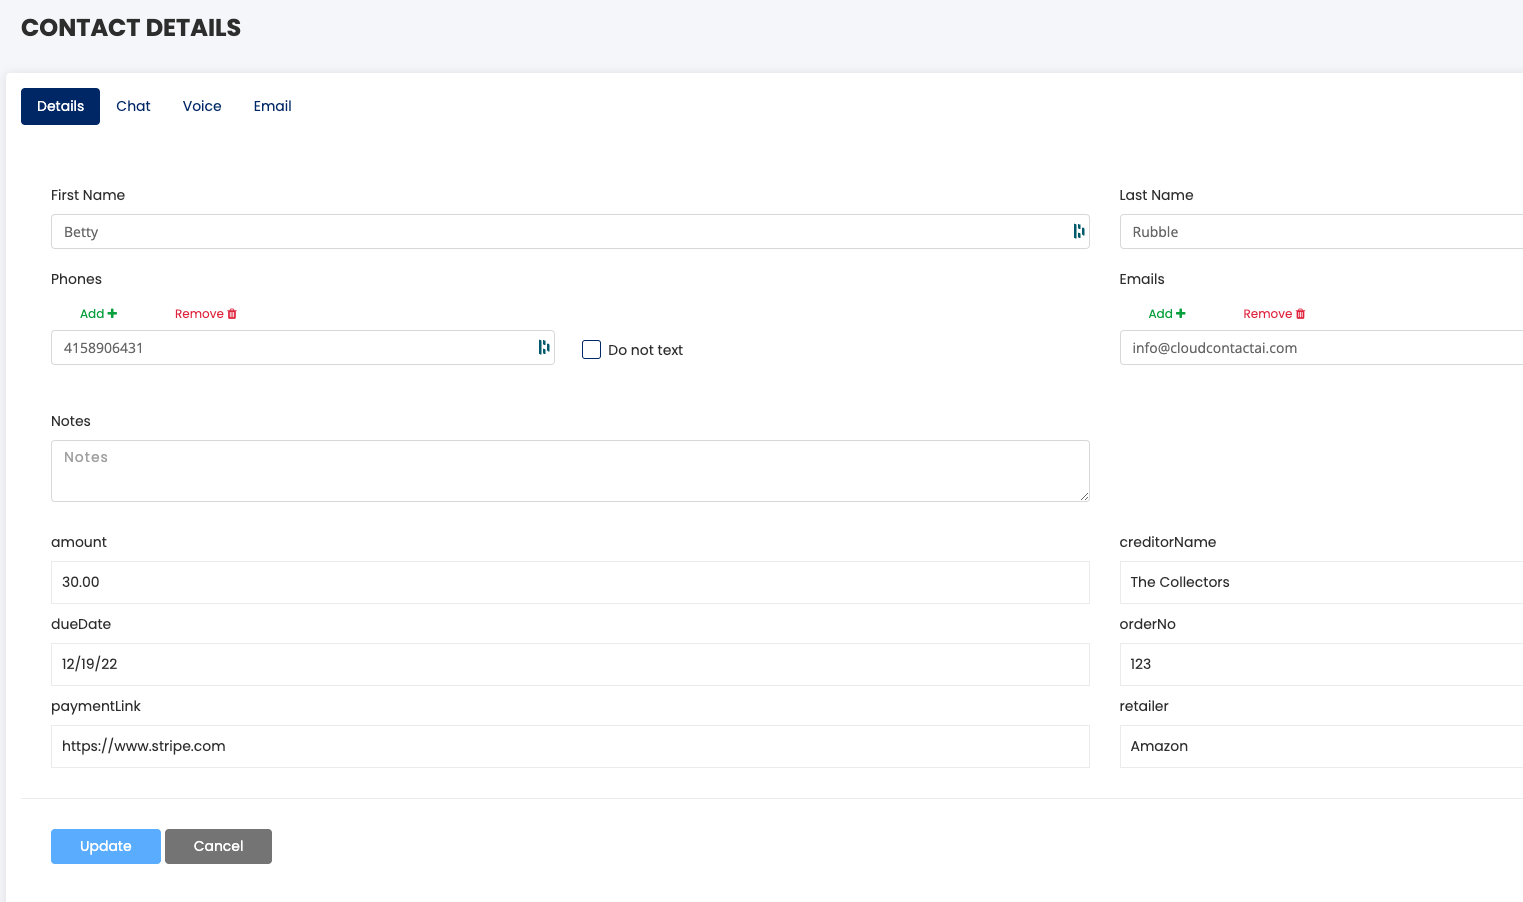
When I click on the uploaded Contact List in the UI, I’ll be taken to the only contact that we uploaded, Betty Rubble. When I click on Betty Rubble, I’ll see Betty’s contact details. What’s interesting with Betty’s contact details is not only are we showing the standard fields: First Name, Last Name, Phone, and email, but were also showing amount, creditorName, dueDate, orderNo, paymentLink, and retailer. CloudContactAI is really flexible when it comes to storing contact details. You just need to include the field definitions in the header row, and we’ll store it as a contact detail. For example, if I wanted to import the field ZipCode, then I would have added another field to the header row entitled ZipCode, and another field value, e.g. 94127, to Betty Rubble’s data row. It’s that simple.
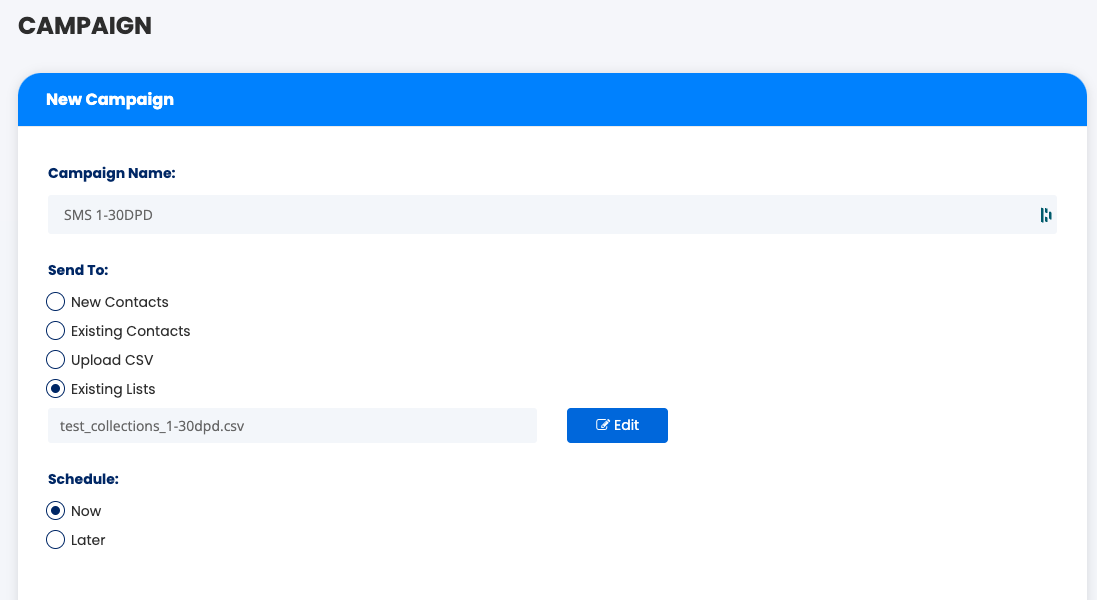
Now, that I’ve got Betty loaded, let’s send her a text to see if I can collect on the $ she owes us. Click on the SMS Campaign. Click on Create SMS Campaign. On the New Campaign view, let’s call the campaign “SMS 1-30DPD”. Let’s specify that we’re going to send to the contact list that we just uploaded.
In the Message section, we’ll specify the Industry as Debt Collection. For Messages, we’ll specify “1-30 Days Past Due (DPD)”. Notice that the Contact Fields have the same tags as the fields that were uploaded with the default debt collection template. These fields will be evaluated dynamically when we launch the campaign.
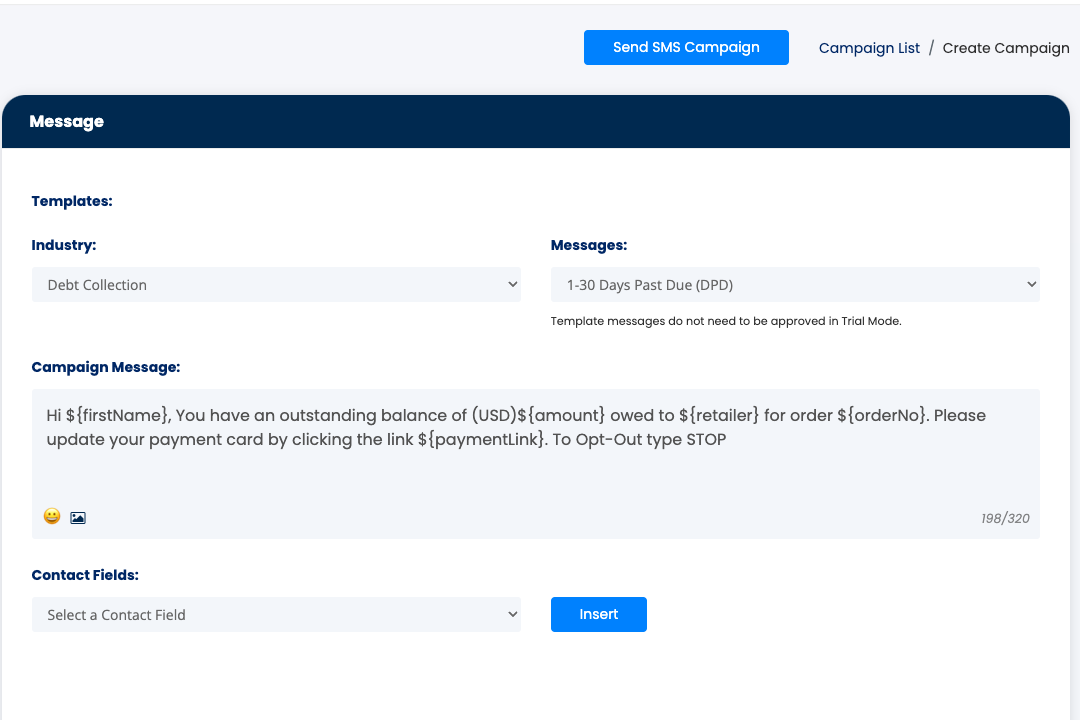
Click on the Send SMS Campaign button. Click through the dialogs, and your campaign will be launched. On the subsequent Campaigns view, click on the “SMS 1-30 DPD” campaign. You’ll be able to see the message that was sent to Betty Rubble with the tags evaluated.
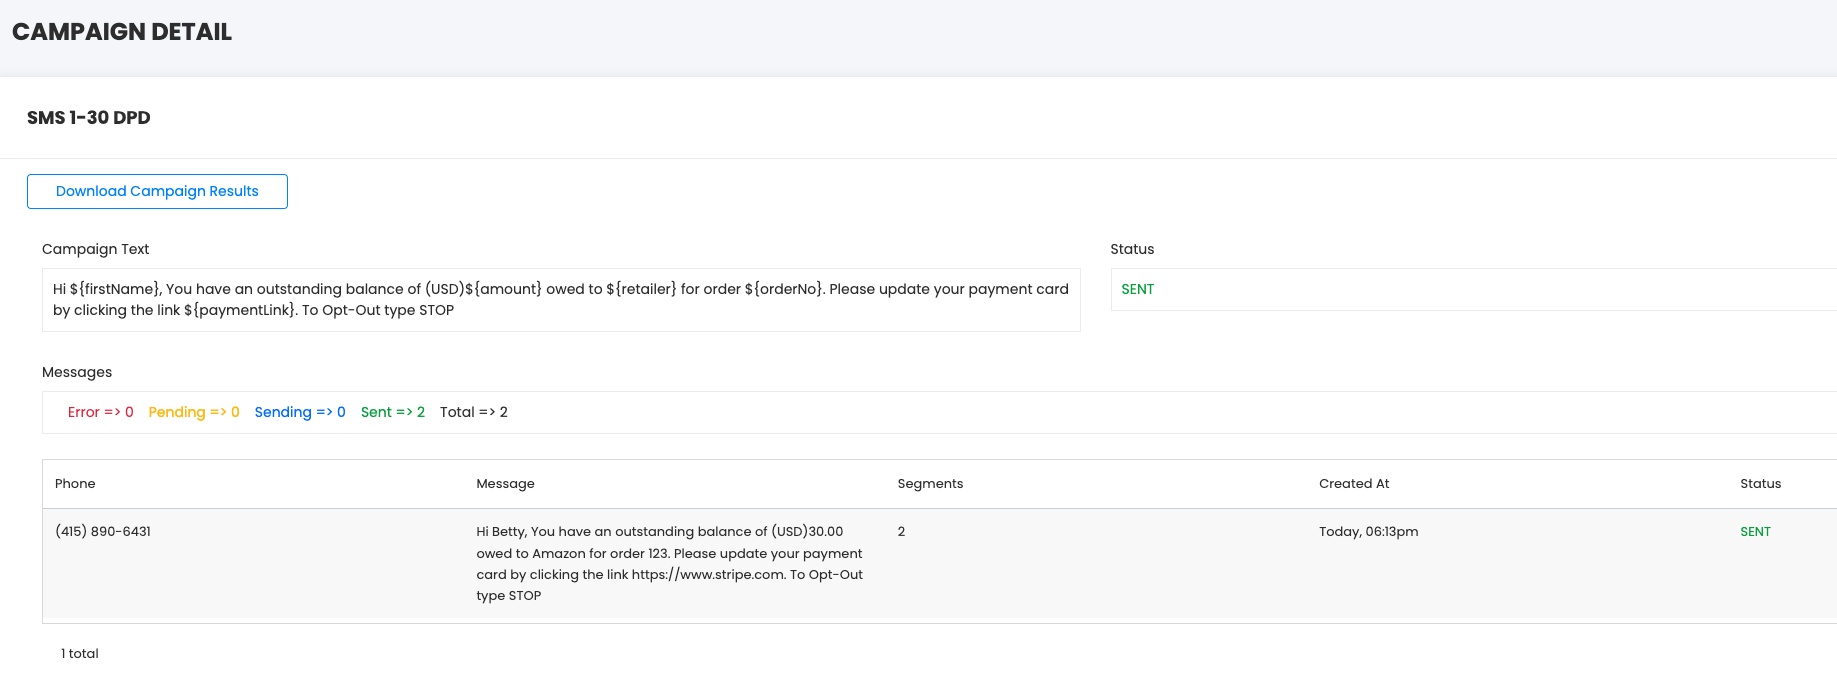
Betty will receive an SMS that looks like

When Betty responds back to your SMS outreach, your Inbox will populate.

You can either respond to Betty, assign one of your colleagues to respond to Betty, set up an auto response, or ignore Betty. If Betty responds with Stop, she'll be immediately moved from any subsequent SMS messages.
To download the results from you campaign, navigate to Reports. Click on the SMS Campaign Report Tab. Click on the Download Campaign Results.
We'll tackle SMS 31-60 DPD in our next post.
Updated 8 months ago
