
Send MMS Programmatically
In this tutorial, we'll show you how to send MMS programmatically using the public API easily and securely with CloudContactAI.
Prerequisite
You will need your CloudContactAI Client ID and API Key. Check the Acquire the Client ID and API Key for the steps to obtain them.
Sending MMS Campaign
Sending an MMS requires three easy steps:
1. Request an upload URL for your file inside CloudContactAI storage.
To create your MMS, you must upload your image/video to CloudContactAI's storage. This requires calling a CloudContactAI API endpoint that will return a URL where you will need to PUT your file.
curl -X POST https://files.cloudcontactai.com/upload/url \
-H "Authorization: Bearer <api_key>" \
-H "Content-Type: application/json" \
-d @- <<'EOF'
{
    "fileName":"<file_name>",
    "fileType":"<mime_type>",
    "fileBasePath":"<client_id>/campaign",
    "publicFile":true
}
EOF
Remember to replace the <api_key>, <file_name>, <mime_type>, and <client_id>`with your values.
Here's an example with values.
curl -X POST https://files.cloudcontactai.com/upload/url \
-H "Authorization: Bearer eyJhbGciOiJSUzI1NiJ9..." \
-H "Content-Type: application/json" \
-d @- <<'EOF'
{
    "fileName":"AllCode.png",
    "fileType":"image/png",
    "fileBasePath":"1/campaign",
    "publicFile":true
}
EOF
Once this request is executed, the server will respond with a piece of JSON.
{
  "signedS3Url":"https://cloudcontactai-prod-public.s3.amazonaws.com/<client_id>/campaign/<timestamp>_sample_file_name.jpg"
}
2. Upload your file to the given URL
Using the URL obtained from the JSON of the previous step, proceed to upload a local image to CloudContactAI storage using a request like this.
curl -X PUT \
-H "Content-Type: <mime_type>" \
--upload-file "<file_name>" \
"<presigned_url_from_previous_step>"
Remember to replace <mime_type> and <file_name>. The <presigned_url_from_previous_step> will come from the response of the previous step.
Here's an example with values.
curl -X PUT \
-H "Content-Type: image/png" \
--upload-file "AllCode.png" \
"https://cloudcontactai-prod-public.s3.amazonaws.com/3755/campaign/AllCode.png?X-Amz-Algorithm=AWS4-HMAC-SHA256&X-Amz-Date=20241212T204736Z&X-Amz-SignedHeaders=content-type%3Bhost&X-Amz-Expires=86400&X-Amz-Credential=AKIAUM7F3V6ESZCOJF56%2F20241212%2Fus-east-1%2Fs3%2Faws4_request&X-Amz-Signature=f512faee4e14212227fd93196778e46c586ad5896c70bbdf44af73cbc6ab68cd"
This request will return an empty 200 OK response.
3. Create your Campaign, including your uploaded image path
Finally, proceed to create a normal campaign, specifying all the basic data, including the key or path to the file you just uploaded, like this:
curl -X POST https://core.cloudcontactai.com/api/clients/3755/campaigns/direct \
-H "Authorization: Bearer <api_key>" \
-H "Content-Type: application/json" \
-H "ForceNewCampaign: true" \
-d @- <<'EOF'
{
	"pictureFileKey":"<client_id>/campaign/<file_name>",
	"accounts":
	[
		{
			"firstName":"Google",
			"lastName":"Voice",
			"phone":"+14152373802"
		}
	],
	"message":"Hi ${firstName} ${lastName}, doing another test",
	"title":"Doing another test"
}
EOF
Remember to replace <api_key>, <client_id> and <file_name>.
Here's an example.
curl -X POST https://core.cloudcontactai.com/api/clients/3755/campaigns/direct \
-H "Authorization: Bearer eyJhbGciOiJSUzI1..." \
-H "Content-Type: application/json" \
-H "ForceNewCampaign: true" \
-d @- <<'EOF'
{
	"pictureFileKey":"1/campaign/AllCode.png",
	"accounts":
	[
		{
			"firstName":"Google",
			"lastName":"Voice",
			"phone":"+14152373802"
		}
	],
	"message":"Hi ${firstName} ${lastName}, doing another test",
	"title":"Doing another test"
}
EOF
Once this request returns, you will get a response like this
{
  "id": 12345,
  "message": "Hi ${firstName} ${lastName}, enjoy our little content!",
  "title": "MMS Content Test",
  "client": {
    "id": 6789,
    "name": "DEFAULT",
    "notifyIncomingSms": true,
    "incomingSmsCC": null,
    "incomingSmsMainEmail": true,
    "smsLimit": null,
    "deletedAt": null,
    "accountId": 101112,
    "apiKey": null,
    "errorRate": 0.0,
    "isTrusted": true
  },
  "senderPhone": null,
  "senderId": 12345,
  "createdDate": "2024-09-19T11:52:31.981314Z",
  "status": "PENDING",
  "fileKey": null,
  "startDate": null,
  "scheduledTimestamp": null,
  "scheduledTimezone": null,
  "endDate": null,
  "runAt": null,
  "useCopilot": false,
  "cron": null,
  "campaignType": "SMS",
  "scheduleMessage": null,
  "listId": 6789,
  "default": false,
  "totalError": null,
  "totalSent": null,
  "totalPending": null,
  "senderEmail": null,
  "editable": true,
  "positiveResponses": null,
  "negativeResponses": null,
  "campaignResources": null,
  "totalErrorRequeue": null,
  "listName": null,
  "syncList": false,
  "sentAt": null,
  "notes": null,
  "workflowId": null,
  "pendingApproval": null,
  "approvalMessage": null,
  "messageContainsUrl": false
}
This response confirms your campaign was created successfully, and will be sent shortly.
You can navigate into CloudContactAI to see your messages.
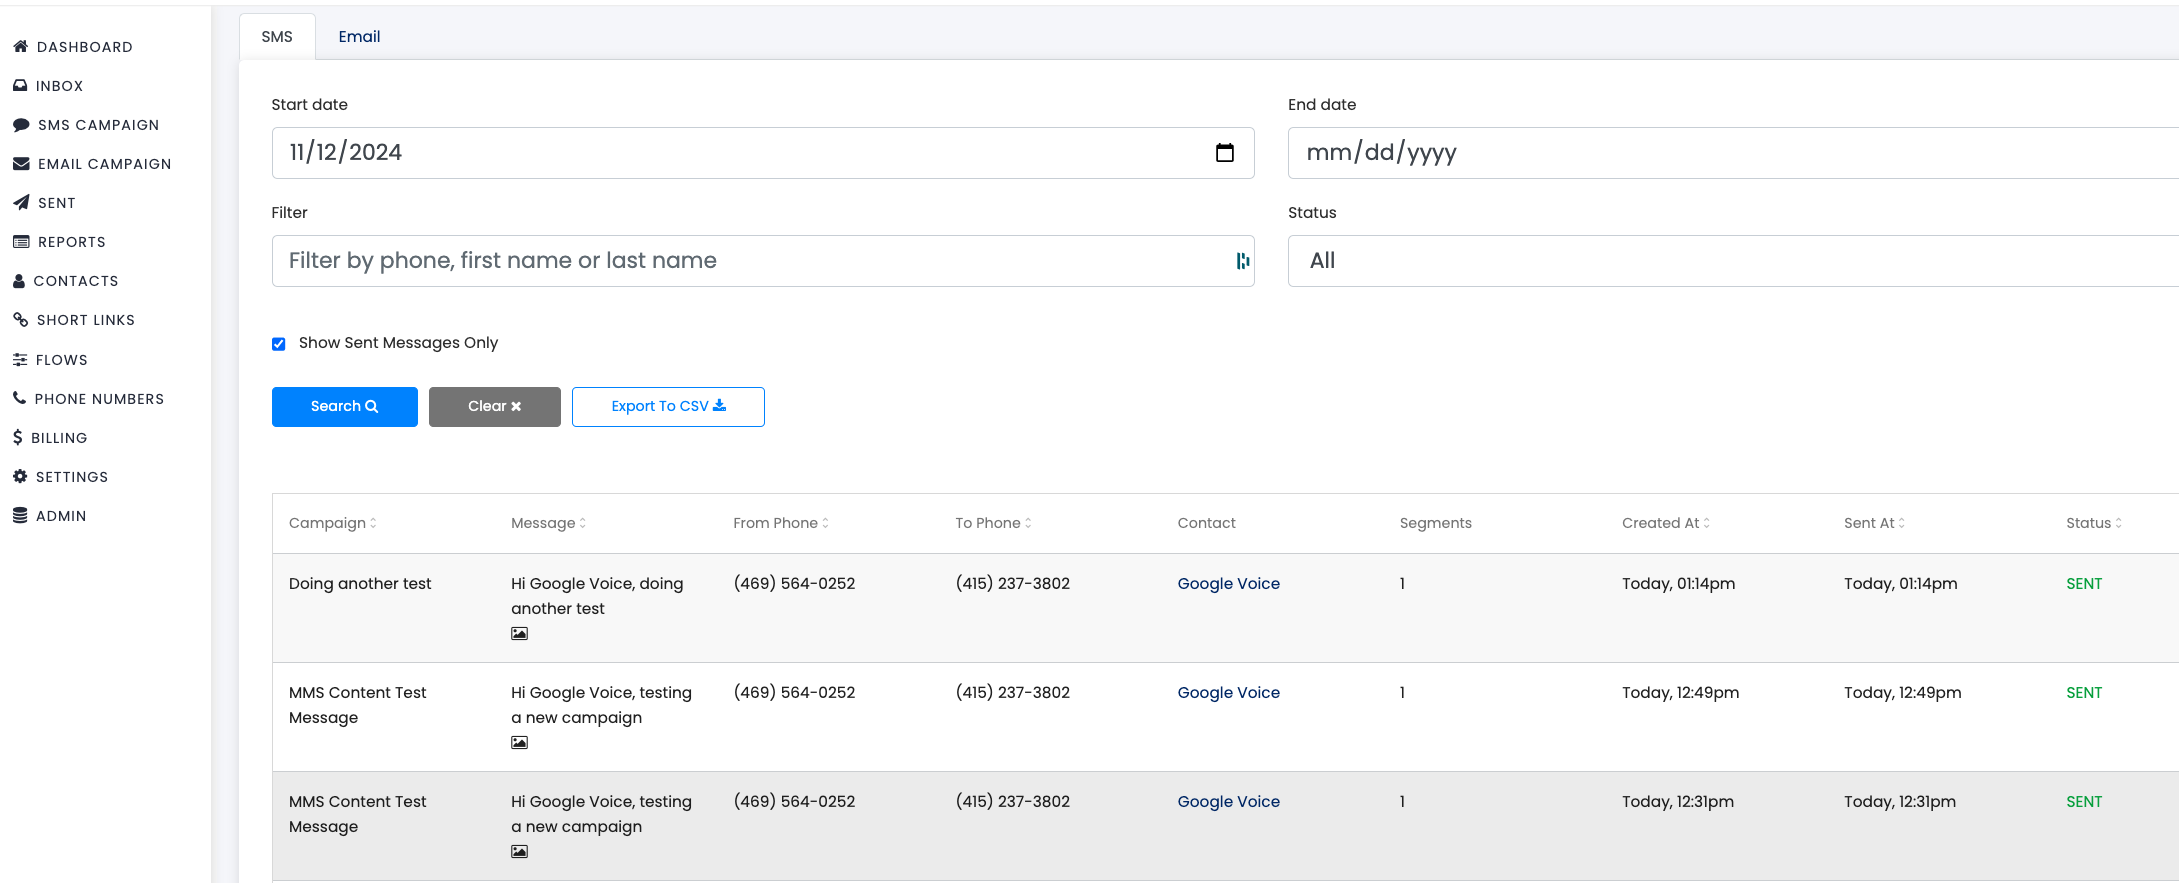
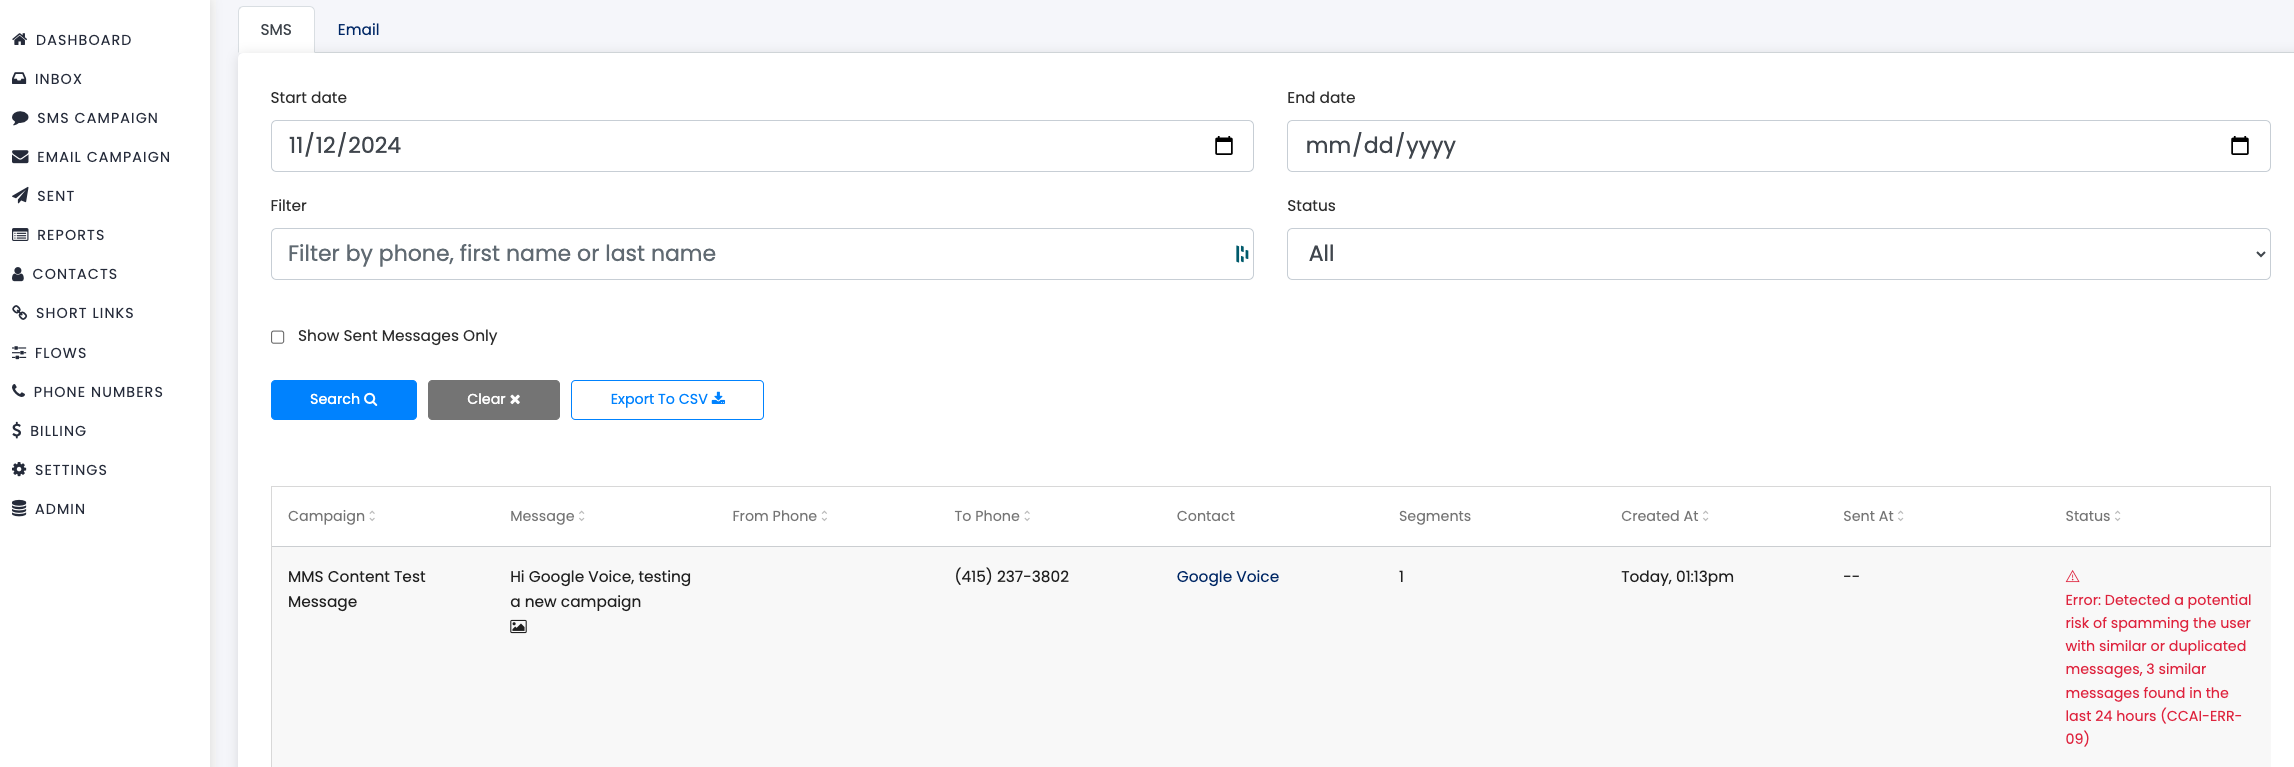
If you don't see that your SMS messages are being sent, deselect the Show Sent Messages Only to view the errors.
Final Notes
- Files have a maximum size of 1 mb to upload, any file bigger than 1 mb will fail to upload.
- File uploads are not tied to specific campaigns, and thus, are reusable. That means you can upload your file once, and use the same file key on multiple campaigns without any drawback.
Updated 5 months ago