

SMS, MMS, and Email Campaigns
Campaigns are what users will be using to send out message segments in bulk to their customers. Everything from promotional events to payment confirmations can be run through our campaign builder. The process is built to be as simplistic as possible while offering a versatile number of options to pick from.
SMS Campaigns

The main feature of the platform is SMS campaigns. Under the SMS Campaigns tab, there will be a list of sent campaigns for users to drill into for additional details, including when it was sent, which client sent it, the campaign contents, and the campaign name. To start a new campaign, click on "+ create SMS campaign" at the top left. Users will then be brought to the following somewhat elaborate UI.

The left half has controls for changing the campaign name, whether it is sent immediately after finishing creating the campaign or scheduled for some time after, and who the campaign is sent to.

Email Campaigns
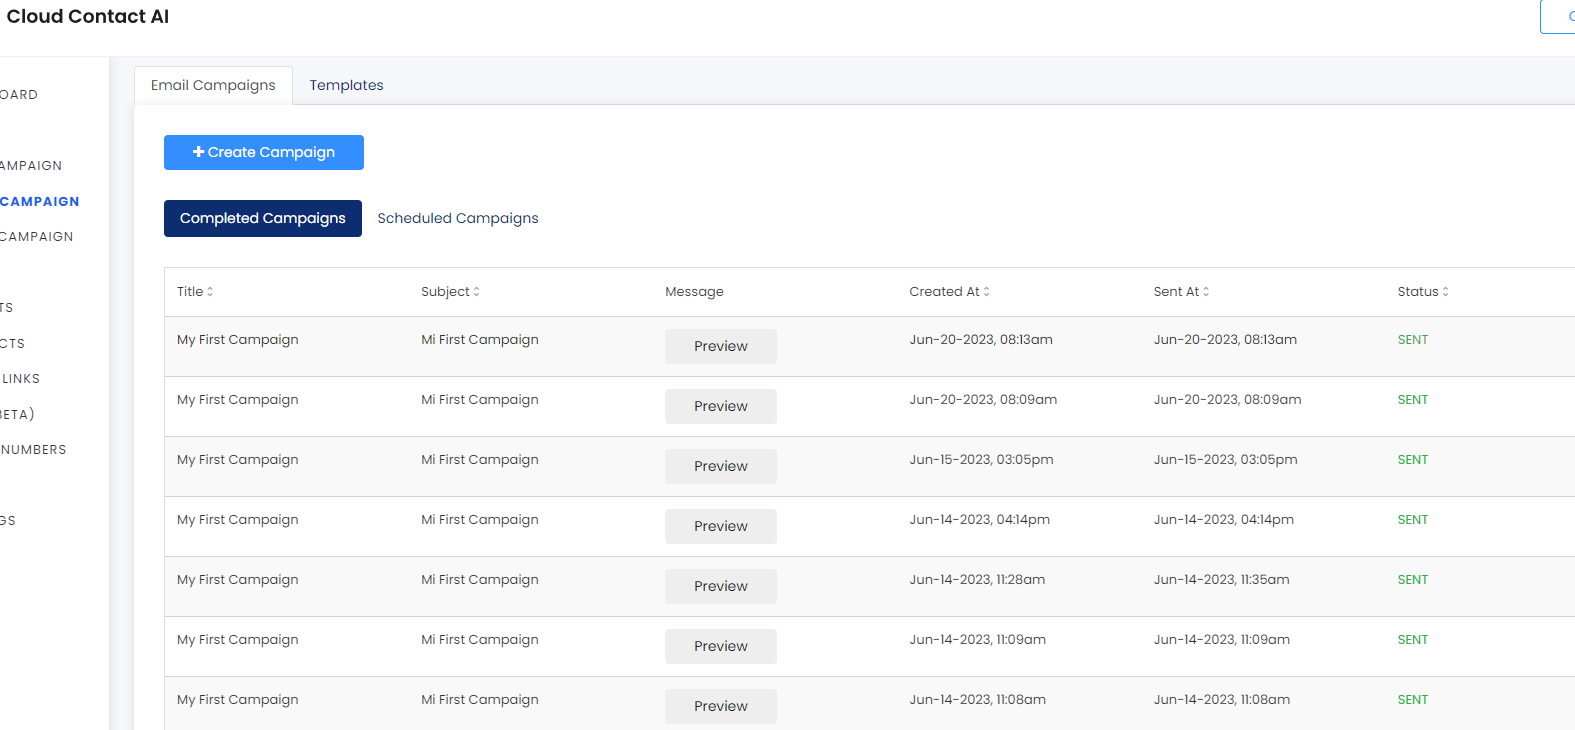
Right below the SMS Campaigns on the side bar is the platform's second main feature, the Email Campaigns. Just like the SMS Campaigns tab, the Email Campaigns tab will feature the list of previously sent email campaigns with the campaign name, email subject, creation date, launch date, and if it had any errors on launch. There are also options to view scheduled email campaigns separately.
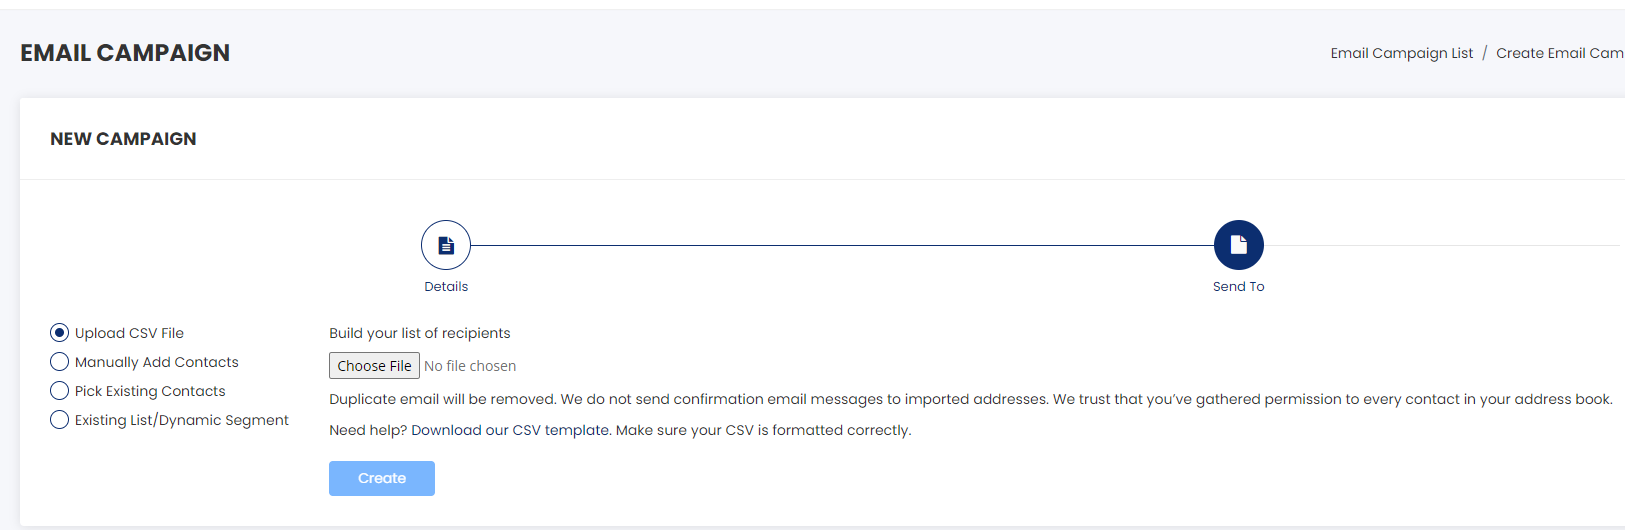
The campaign creator does have very simple click-and-drag controls and an intuitive UI. The first stage of the creator involves building the email out.

Once you are done building the campaign, clicking 'next' will direct the user to options to select which contacts they will want to send the email campaign to. Just like the SMS campaigns, there are options to input the users manually with the campaign, upload a contact list, or choose any variety of already uploaded contacts.
Managing Contacts
There are several options for how to send the campaign.
- Make New Contact - A new popup will appear for what contacts are to be added following the campaign's created to the contacts lists.

- Select Existing Contacts - A popup with the user's pooled collection of contacts will appear to be selected at will.

- Upload a CSV File - Users can upload a new CSV with contacts that have yet to be added to CCAI through the campaigns tab. A template can be found underneath the contacts tab.

- Existing Lists - The last option brings up a list of contact lists that the user has either uploaded or manually composed under the contacts tab.

Campaign Contents
The right side of the page contains a window for managing what the campaign says, a dropdown with templates organized by industry, and a dropdown for inserting autofill variables.


Any campaigns with between 160 and 320 characters will count as two segments and two messages for each one sent on the bill.
After Sending a Campaign
Once a campaign is sent, if the campaign is to more than one person and/or has a hyperlink in its contents, the campaign will first be vetted through us to ensure that the campaign consists of no malevolent content. In the meantime, users can still check on the status of the campaign from the SMS campaigns tab.
Campaign Status
From here, campaigns will either show that they were successfully sent or met an error. These can be inspected from the campaign details.


Visual Guide
Updated about 1 year ago